Converting Acorn Fonts to TTF
Posted on Tuesday, August 6, 2019 by TheBlackzone
![]() Recently I converted a bunch of vector graphic files from my old Acorn RiscPC (mainly created with !Draw and !ArtWorks) to SVG files. The conversion was of acceptable accuracy with the exception of text objects. These where mostly garbled because they used some of the native Acorn Fonts of the time, which are not available on other platforms. So I was looking for a way to convert those fonts into a format that can be used on my Linux system...
Recently I converted a bunch of vector graphic files from my old Acorn RiscPC (mainly created with !Draw and !ArtWorks) to SVG files. The conversion was of acceptable accuracy with the exception of text objects. These where mostly garbled because they used some of the native Acorn Fonts of the time, which are not available on other platforms. So I was looking for a way to convert those fonts into a format that can be used on my Linux system...
I would like to point out, that I had no intention to recreate an exact and complete font transformation of the original Acorn fonts. My goal was to just get those fonts into a usable format to get an somewhat accurate display of the original graphics file and to be able to convert its text objects to path objects.
Tools Of The Trade
Luckily, the open source software universe has a plethora of great tools that help solving even the most abstruse requirements. And this is also the case this time. The font creation suite FontForge, which is part of most Linux distributions, has a tool that can convert Acorn fonts to its own native SFD format. Once converted, it is easy to export a font to any other font format. The tool is named "acorn2sfd" and is described on this documentation page.
Before I go into the details of the conversion process, let's have a quick look on how Acorn Fonts are stored on RISC OS based systems.
Each font is placed in its own directory and usually consists of two files. The main file is named "OUTLINES" and holds the font outline information. A second file named "INTMETRICS" contains additional information on the advance widths of each character. In some cases there might also be a third file named like "BASExxx" that has additional information on the font encoding. For a conversion we need at least the "OUTLINES" file to get the font shape, but for a somewhat accurate display of text objects the "INTMETRICS" is also essential.
That being said, there was one small obstacle for me to be solved first...
Although "FontForge" is available in most Linux distributions, the tool "acorn2sfd" was in my case not included. I tried two different installations with Debian Linux and Xubuntu Linux, but it simply wasn't there. So I ended up having to compile FontForge from source as the GitHub repository had everything I needed.
I will not go into the details of building FontForge from Source (as it is thoroughly described here), but if you end up in the same situation, be aware that you need to compile the "acorn2sfd" utility separately after you have completed the build process of the main program:
cd fontforge/contrib/fonttools make sudo make install Converting A Font
Okay, now that we finally got everything ready, time to convert our first font. For this purpose I have copied the "Newhall" font from my RiscPC. Executing
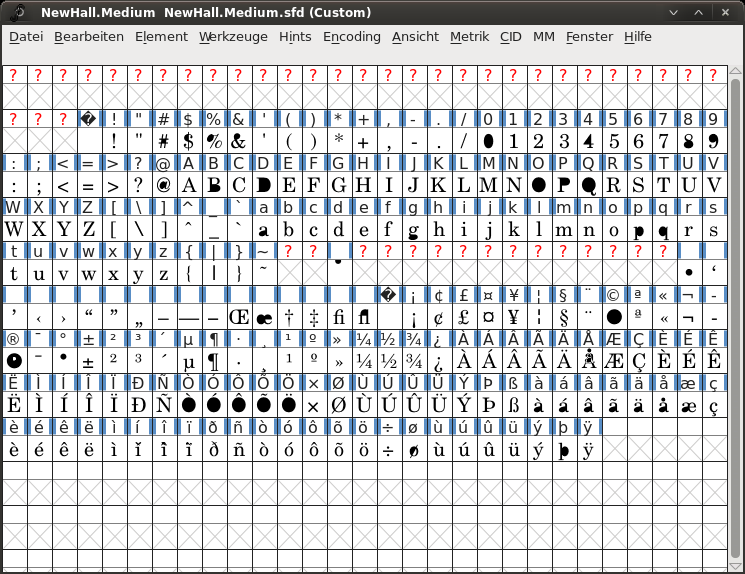
cd NEWHALL/MEDIUM acorn2sfd creates the file "NewHall.Medium.sfd". Now, starting the FontForge main application and opening the sfd file that has just been created, we see the converted font:

You will immediately notice that something doesn't look right. Some characters are filled completely black. This is caused by the fact, that Acorn fonts use a different fill rule. To correct this, we select everything in the grid by pressing CTRL-A, then choose "Correct Direction" from the menu "Element". Now it looks better...

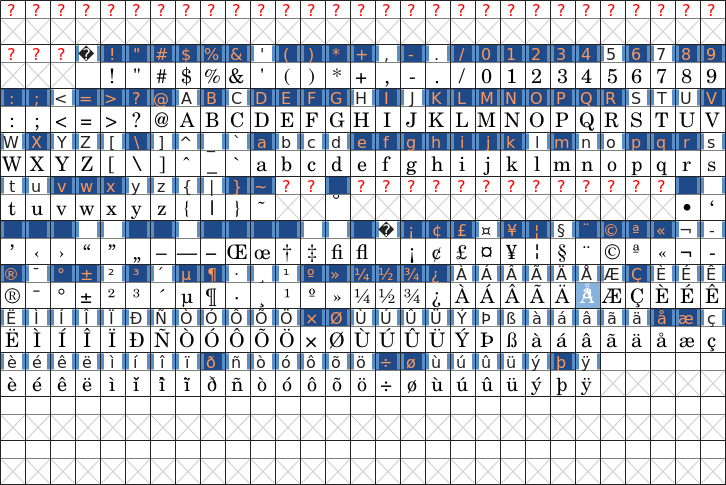
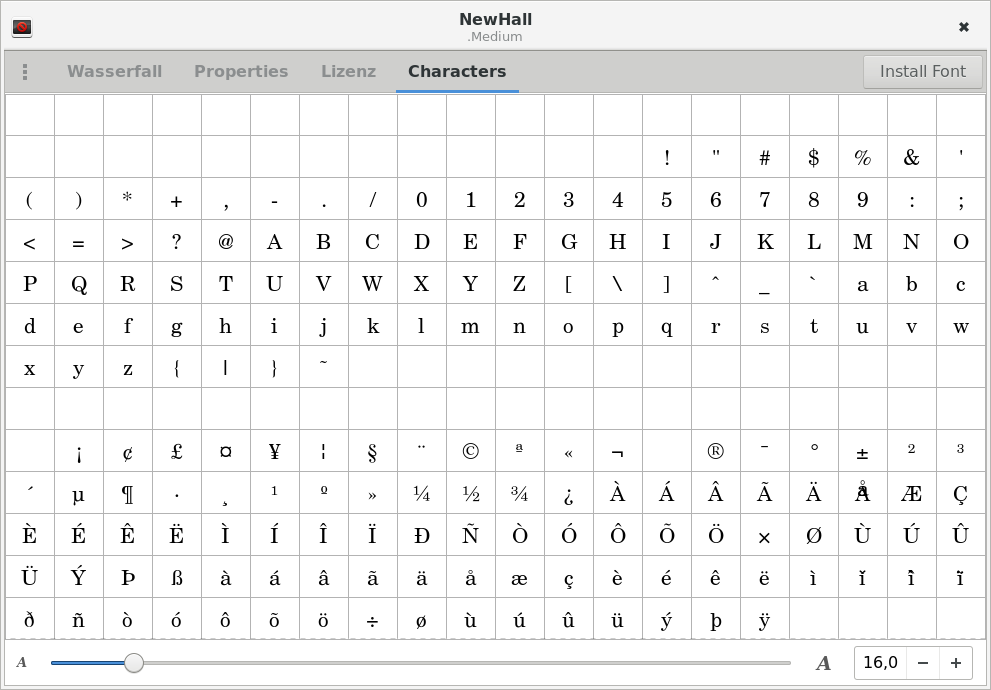
Next we can create a TrueType font simply by executing the "Forge Font" function from the file menu. And, voila, a nice TTF version of the Acorn font:

Although this process is pretty straightforward and works in most cases, I have occasionally noticed some weirdness on single glyphs like this one:

These "glitches" must be corrected by editing the glyphs in FontForge. I am not sure if this happens due to a bug in the conversion utility or if the glyph in question is already somewhat "unusual" in the original font file (though it looks okay on the RISC OS machines).
Additional Information
As I said above, my motivation to use this procedure was to be able to accurately convert some of my old documents. So I was mainly interested into a handful of fonts I was originally using on my Acorn Archimedes A5000. Luckily most of the fonts I have used back then already were Type1 postscript fonts, which can be more easily converted or don't need any conversion at all. So there were only a few fonts that I had to convert.
Also, it's good to know that some of the fonts that came with RISC OS (Version 3.1 in my case) can be directly replaced with Postscript fonts. Originally there where three fonts built into the ROMs: "Corpus", "Homerton" and "Trinity". Additionally, a couple of fonts came on Diskette as part of the !Fonts application. Those were: "System (fixed)", "System Medium", "Portrhouse" and "Selwyn".
The RISC OS 3.1 user manual has a translation table that shows the correlation to Postscript fonts:
Acorn Font Postscript font family
Trinity Times Corpus Courier Homerton Helvetica Selwyn Zapf Dingbats
It should be noted that the usability of most of the older Acorn fonts is very limited due to the fact that a lot of internationally used characters are missing. For example, some fonts of RISC OS 3.1 do not even have German Umlauts. Others, like Homerton for example, have Umlauts in non-standard font locations.

Conclusion
Given that there are postscript replacements for the original Acorn system fonts and that most of the additional fonts used on RISC OS already had been Type1 fonts, the occasions to convert an Acorn Font might be very rare.
However, for those rare occasions, when you need the best approximation of the original document and there is no suitable replacement available, this procedure might come in handy.


